Documentation
Groups
Groups
Groups
Navigate to Administration > Users & Access > Groups. Click Administration in the Management section of the left sidebar, expand Users & Access, and select Groups.
User roles, which define access permissions in the Web Interface, are assigned at the group level. You can create or modify roles as needed, ensuring that each user has the appropriate level of access based on group membership.
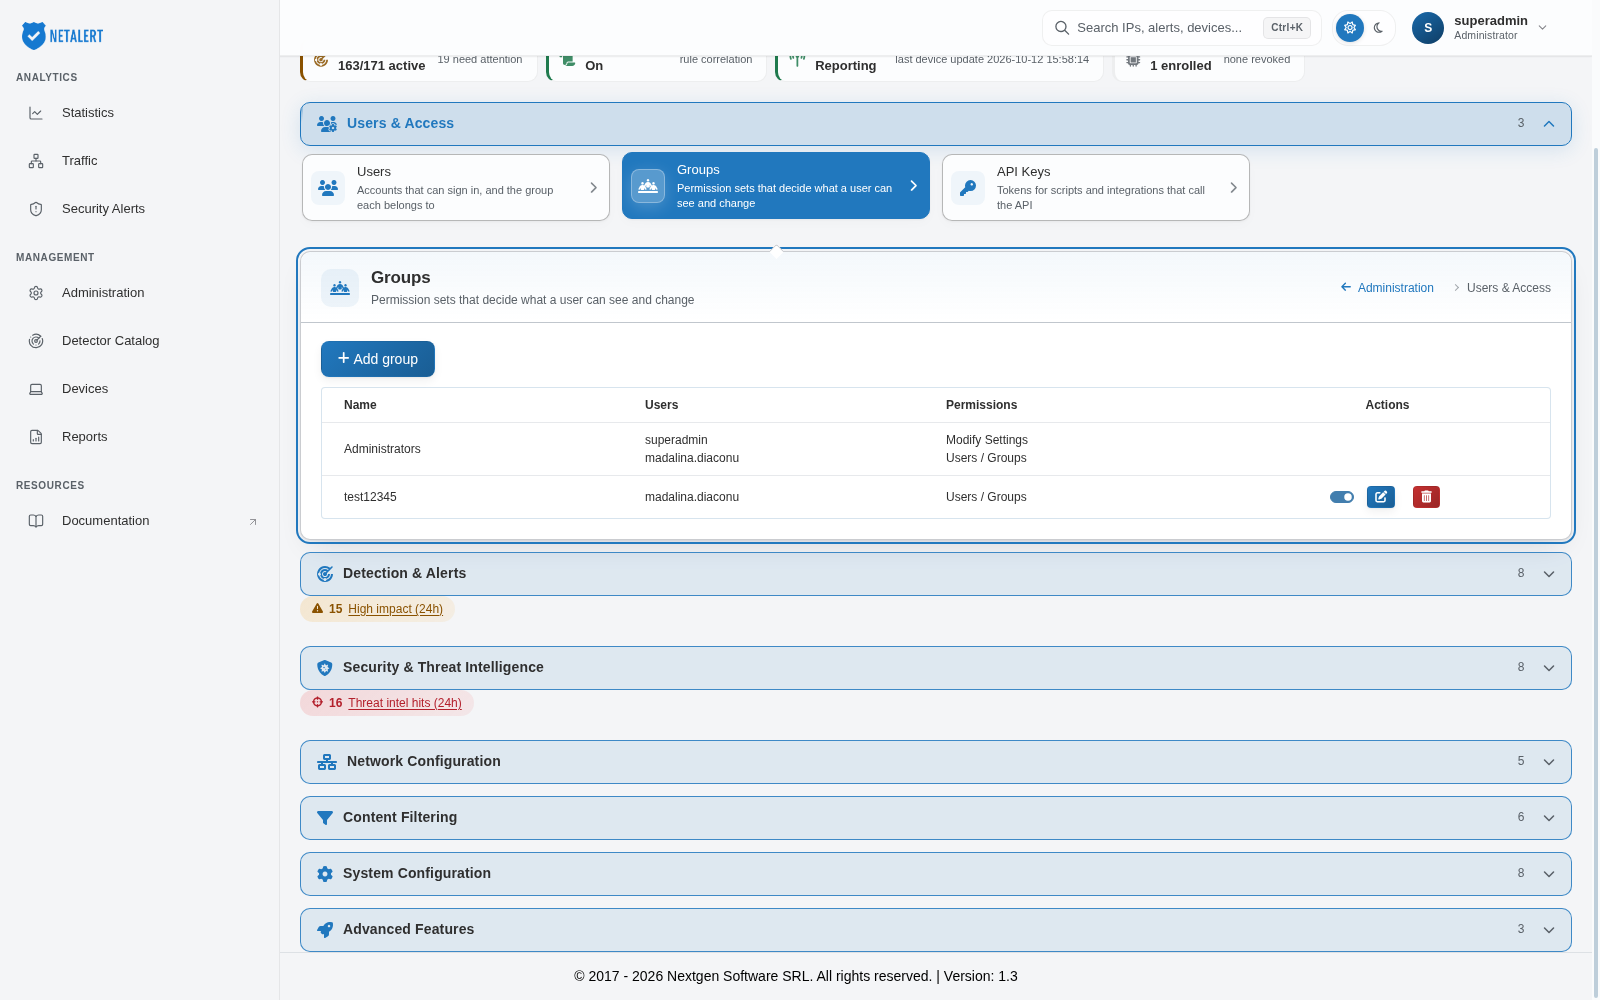
The table lists each group’s Name, its Users and its Permissions, with the available Actions on the right.
To create a new group, click Add group. This action opens the group creation page, where you can specify group details and roles:
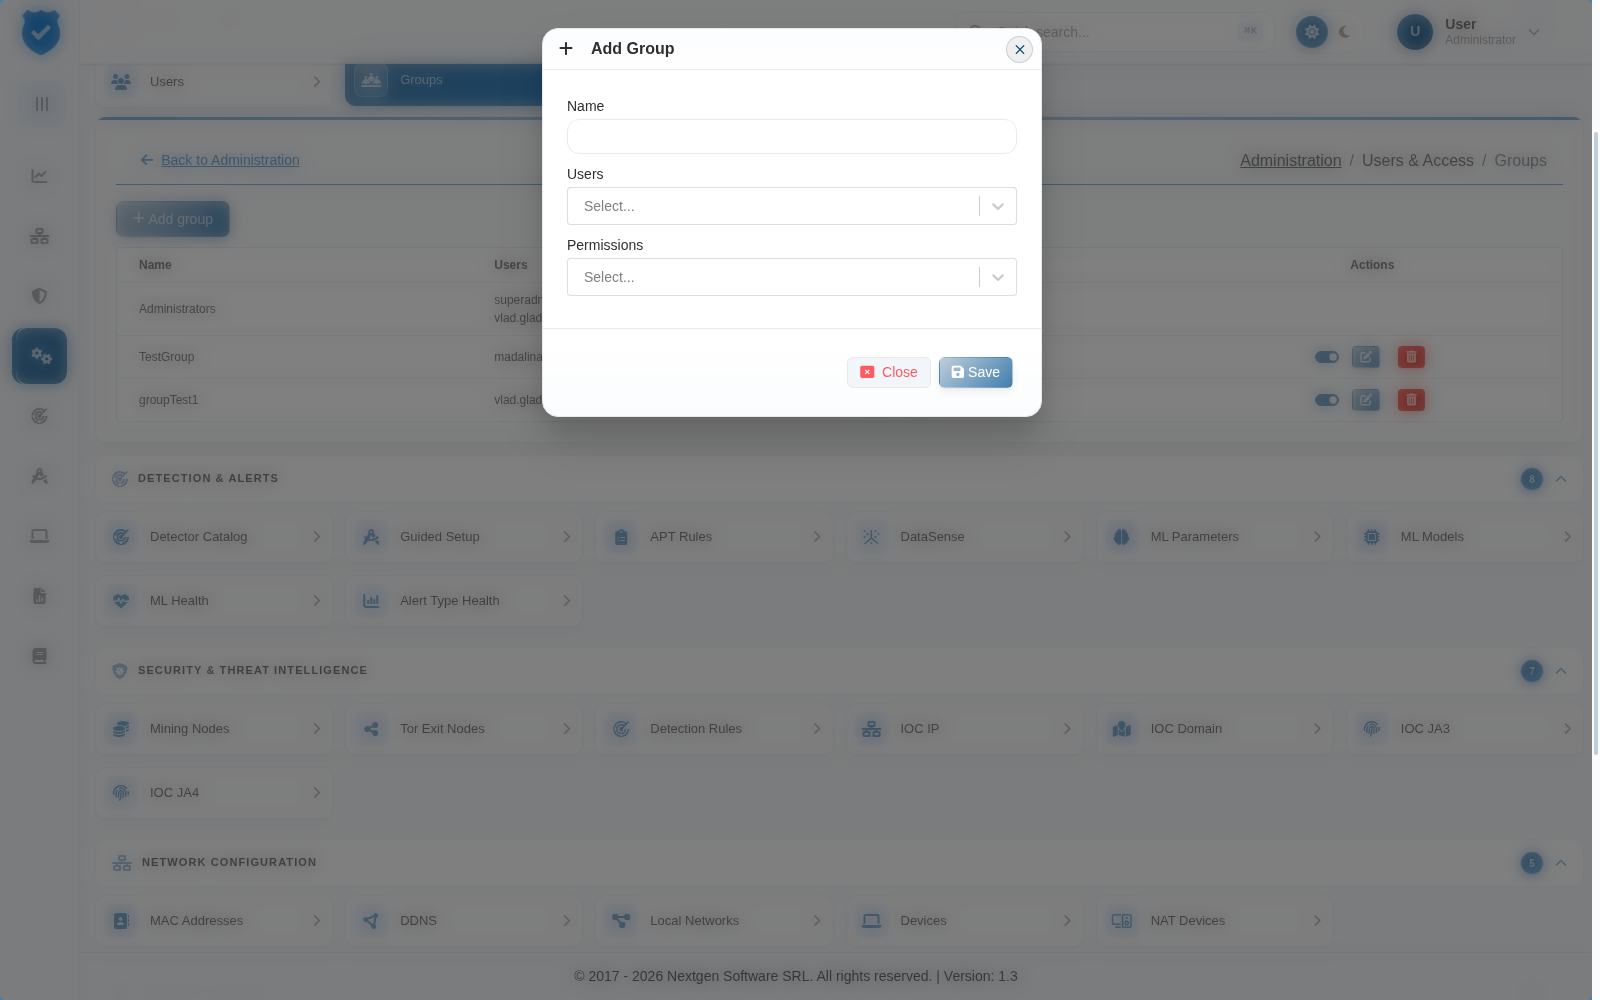
- Name – Enter a unique name for the new group.
- Users – Select the user accounts that will be associated with the group’s predefined rules.
- Permissions – Choose the access permissions to be granted to members of this group. You can only grant permissions that you hold yourself; otherwise saving is refused with You cannot assign a permission you do not hold yourself.
Click Save to finalize the group creation or Close to exit without saving. Alternatively, close the window without saving by clicking the X in the top-right corner.
Below is an example illustrating the addition of a UserTest account and a Group 1, both successfully created within the system.
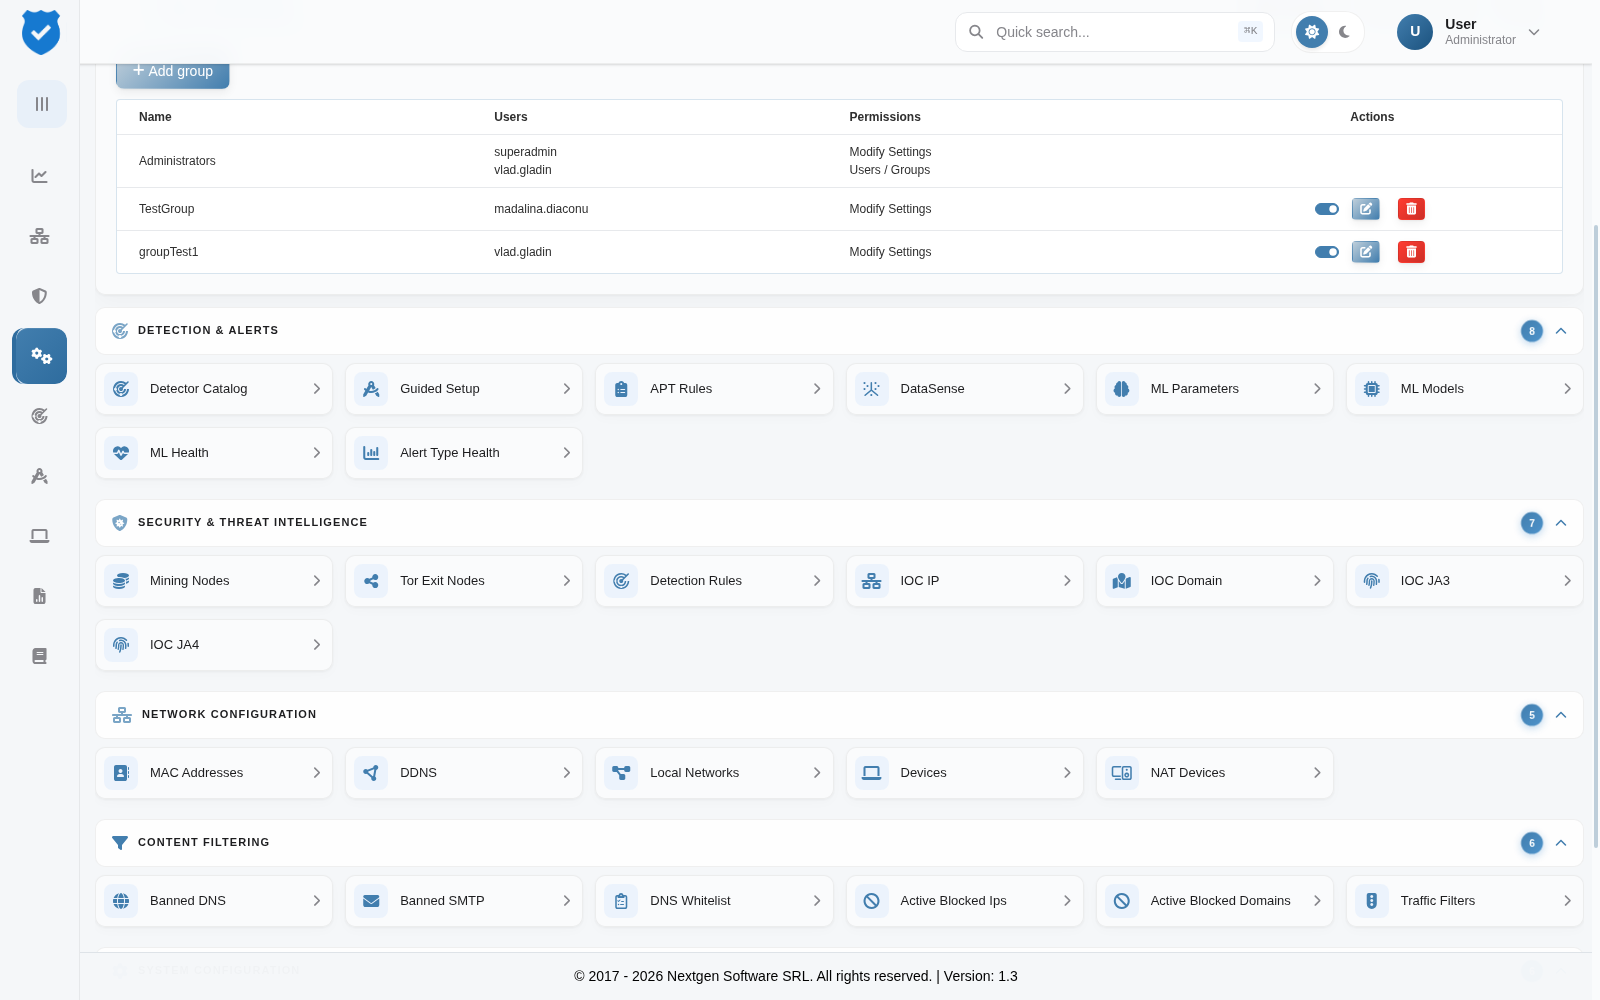
After creating a group, the following actions are available:
- Active switch – Activate or deactivate the group. A confirmation message reports the new state.
- Edit – Modify the group’s name, users and permissions.
- Delete – Remove the group from the system. You are asked to confirm first.
The built-in Administrators group has no actions: it cannot be disabled, edited or deleted.
Go back to the Administration index.