Documentation
How to connect to CQ Threat Intelligence
Log in to the CYBERQUEST web interface with an account with administrative rights.
Navigate to Settings
Log in to the CYBERQUEST web interface with an account with administrative rights.
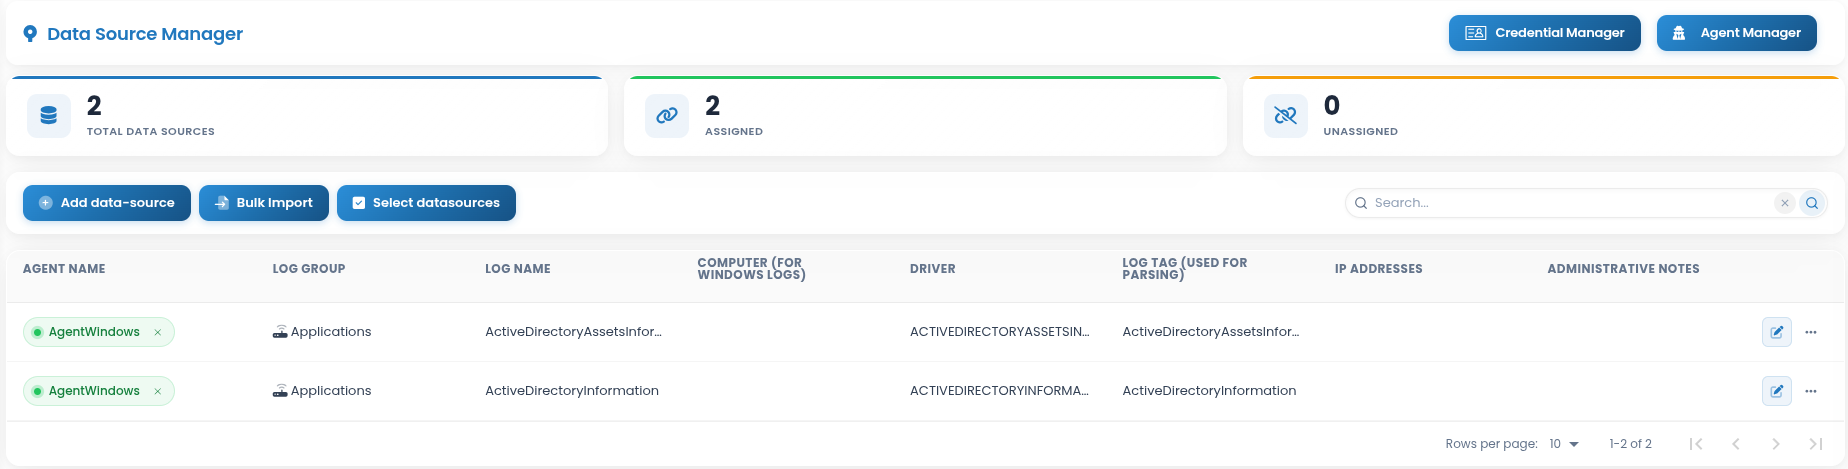
Navigate to Settings > Management > Data Source Manager.
This page contains all the data sources added in the CYBERQUEST application.
Press the “Add data-source” button and complete the following form:
DataSource Type: Select “CQApi / Cyberquest Threat Intelligence (LogName: CQTI)” data source type;
DataSource Information: This field is filled in automatically with data source information;
Query Interval: How often API polling runs. Defaults to every 60 seconds;
Credentials to use: Select appropriate credentials from the drop-down list
Tag: A unique identifier automatically assigned to the data source;
Administrative Notes: Optional notes for administrators;
Anonymize Fields: Select fields to be anonymized. One or more options can be selected;
Script: Configure feed parameters as required;
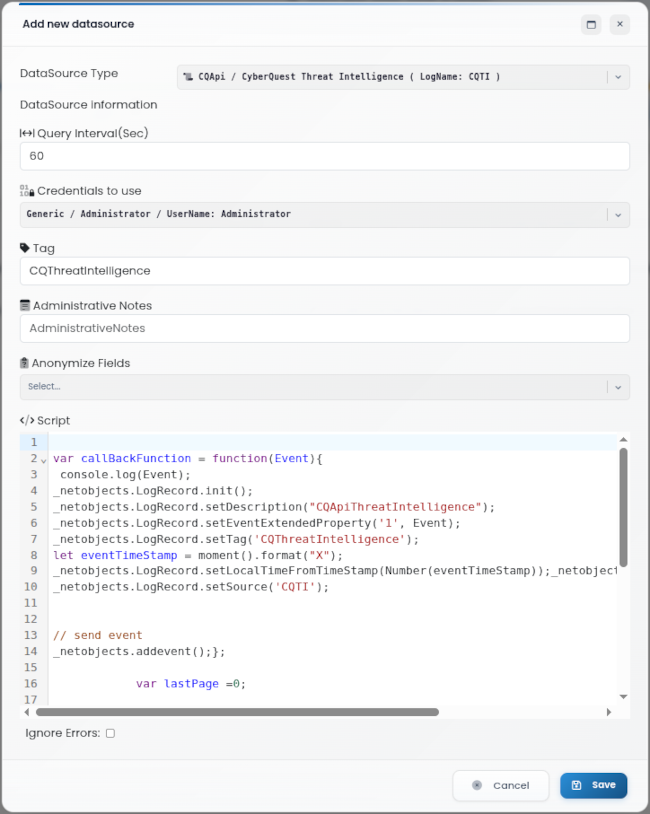
Click the “Save” button to save the data source.
Assign the CYBERQUEST agent
The next step is to assign the CYBERQUEST agent to this data source. Press the drop-down list and choose the agent.

- Edit: Click the
 button to update the data source information. The steps are similar to adding a new data source.
 - Clone: Click the
 to create a duplicate of the data source.
 - Delete: To remove a data source, unassign the Agent first, then click “Delete”.