
Documentation
First Steps
Web Interface is a consolidated web frontend hosting all administration and operation functionalities of CYBERQUEST. The web interface is compatible with all…
Accessing the web interface
Web Interface is a consolidated web frontend hosting all administration and operation functionalities of CYBERQUEST. The web interface is compatible with all major browsers on the market.
To access Web Interface, open a web browser and type the application’s address or DNS name. The default address initially assigned to Web Interface is https://CyberquestIPAddress (example).
The browser automatically redirects you to CYBERQUEST’s authentication page:
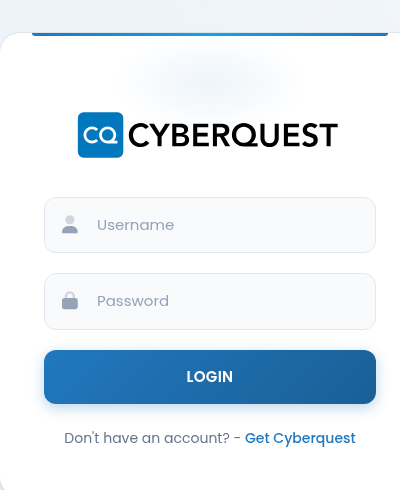
User Authentication
Authentication can be accomplished in one of two ways:
Using a local user defined in the application;
Using a company’s Active Directory user. This facility allows authentication with Active Directory credentials when LDAP integration has been configured within application. The user must belong to one of two Active Directory security groups: “CYBERQUEST Administrators” or “CYBERQUEST Users”.
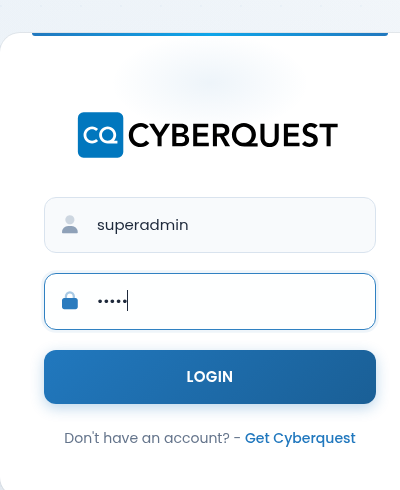
Type the default username and password, then select the interface language.
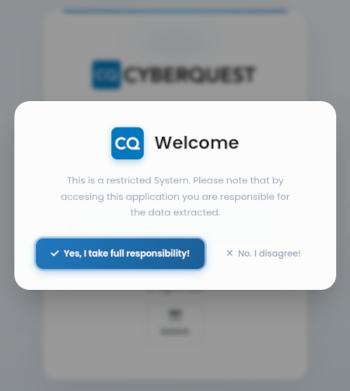
You will be prompted with a default message about accessing restricted information. This message is fully customizable.
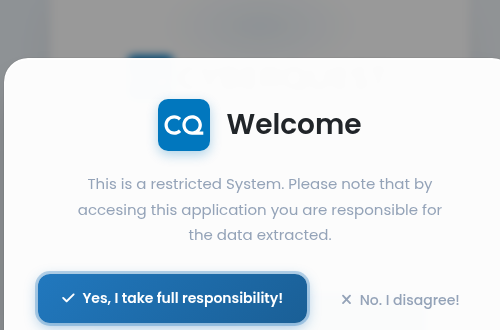
Accept the responsibility by clicking the button Yes, I take full responsability!. Else No. I disagree! and you will be redirected to the authentication page.
 The initial authentication is performed under the default administrative account. When authenticating as administrator, an additional confirmation box is displayed. This additional authentication step was introduced to notify on indiscriminatory access to the entire platform configuration and to require user confirmation of acknowledgement. Superadmin activity should be performed with maximum responsibility and knowledge of platform’s administration. Wrongfully changing configuration, rules and retention policies can break access to analytics data, delete or damage objects, and more important, can cause permanently loss of history data.
Changing User Password
Once authenticated, a user can change his password from User menu. This is a strongly recommended action after the first login, and it can be performed at any time forward. In order to change your password, access User > Change password option.
To see how to change the password, please follow the link: Changing user password
Managing Users and Groups
Role Based Access Control (RBAC)
User accounts created can be configured to access components based on the user role assigned to their account. You can add or edit user roles and user accounts as needed.
Add a new user
Log in to CYBERQUEST with an administrative account.
Navigate to Settings > Users and Groups > Users.
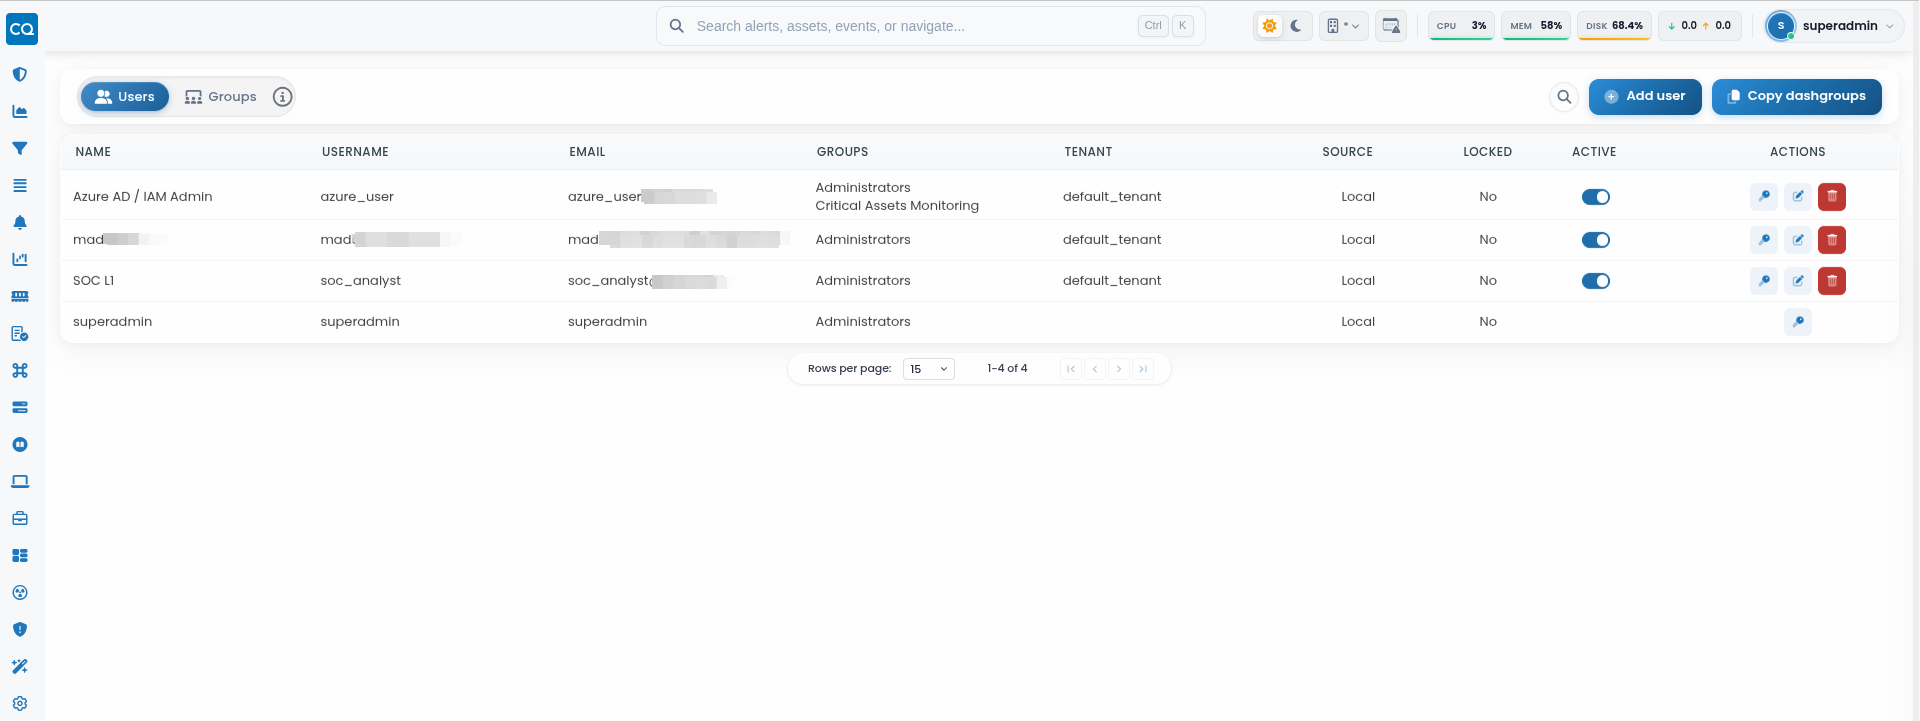
- Click Add user.
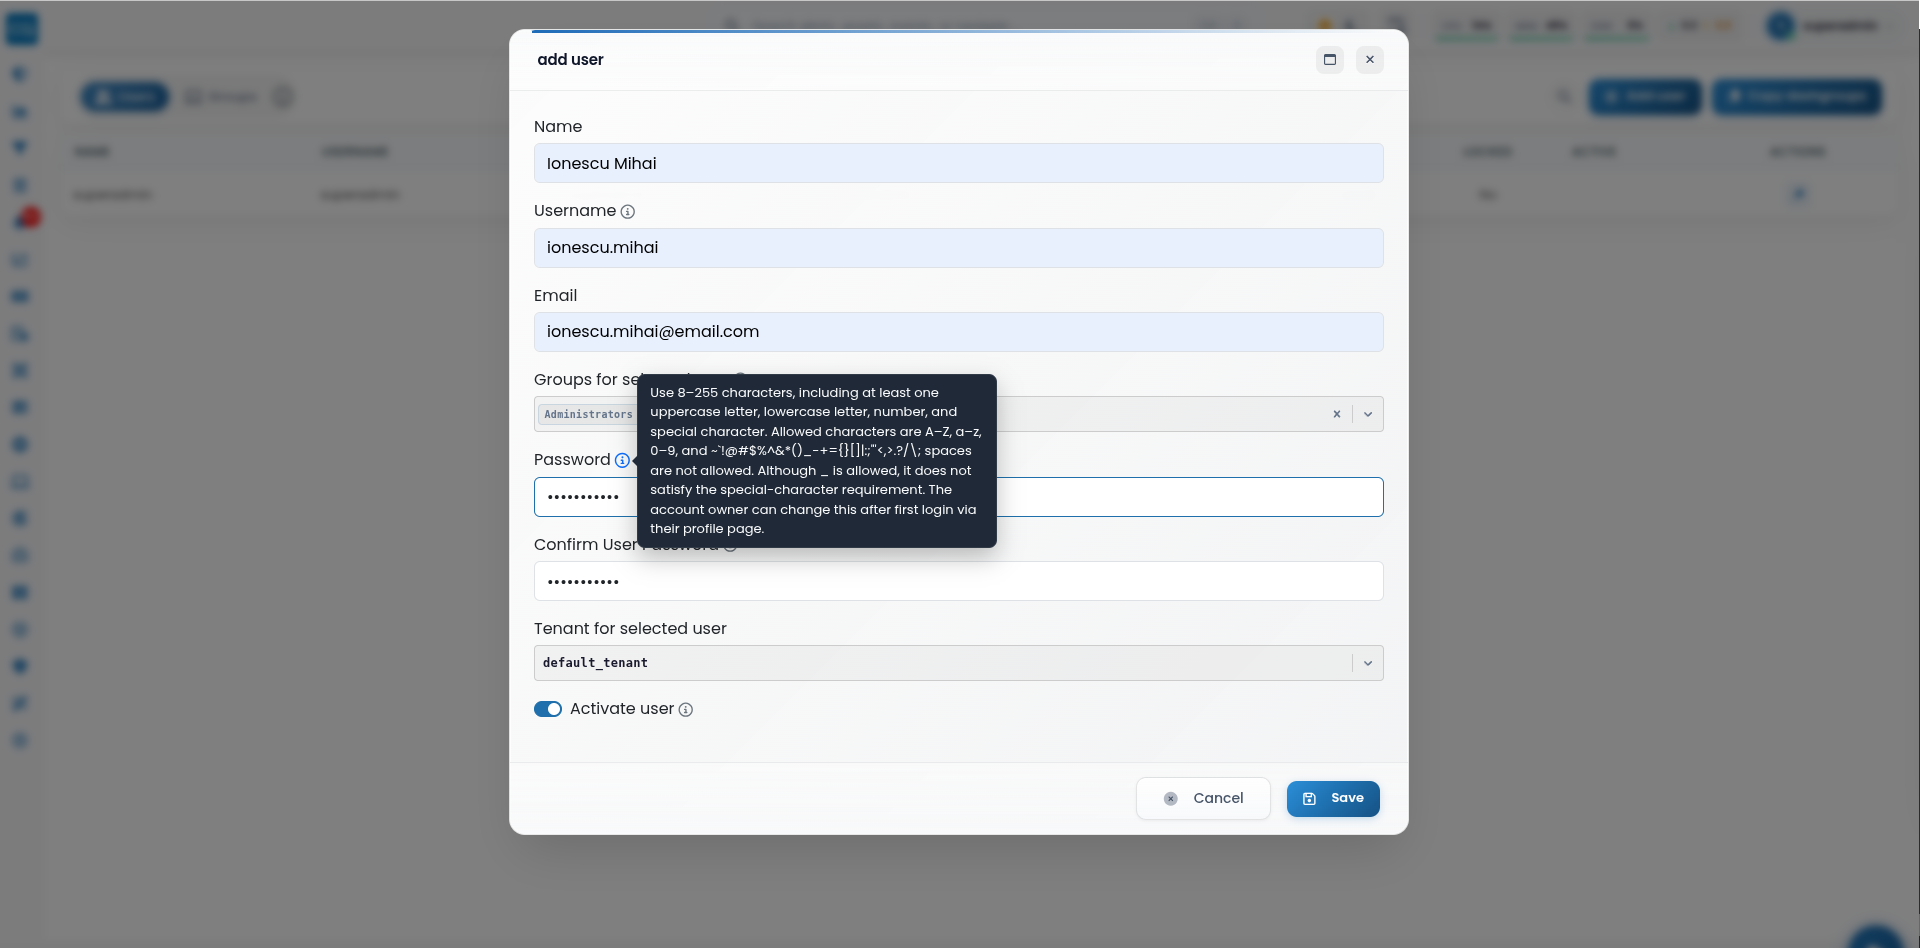
Configure the user account by specifying:
Name - Specifies the full or display name of the user account.
Username - Defines the unique username used by the user to authenticate in CYBERQUEST.
Email - Specifies the email address associated with the user account.
Groups for selected user - Assigns the user to one or more groups, inheriting the roles and data-access permissions configured for those groups.
Password - Defines the password used by the local user account for authentication. The password must contain 8–255 characters and include at least one uppercase letter, one lowercase letter, one number, and one special character; spaces are not allowed.
Confirm User Password - Confirms the password entered for the user account and ensures both password values match.
Tenant for selected user - Associates the user account with the selected tenant and determines the organizational scope in which the account operates.
Activate user - Enables or disables the user account and controls whether the user can access CYBERQUEST.
- Click Save to create the user.
Add or edit User Roles
User roles are assigned to user accounts to control access in Web Interface. You can add or edit user roles as needed. Roles are assigned at group level.
In order to add or edit user roles:
a. Login to application with an administrative account.
b. Navigate to Settings menu by pressing  button, in the left side of the interface where are the quick access buttons, then click Groups.
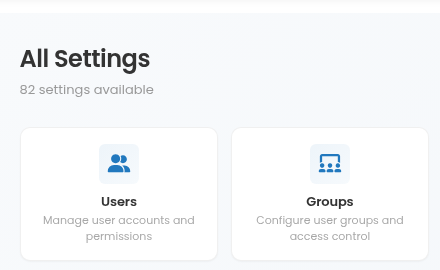
c. Groups configuration page opens:

d. In Groups page, click button and the window will open:
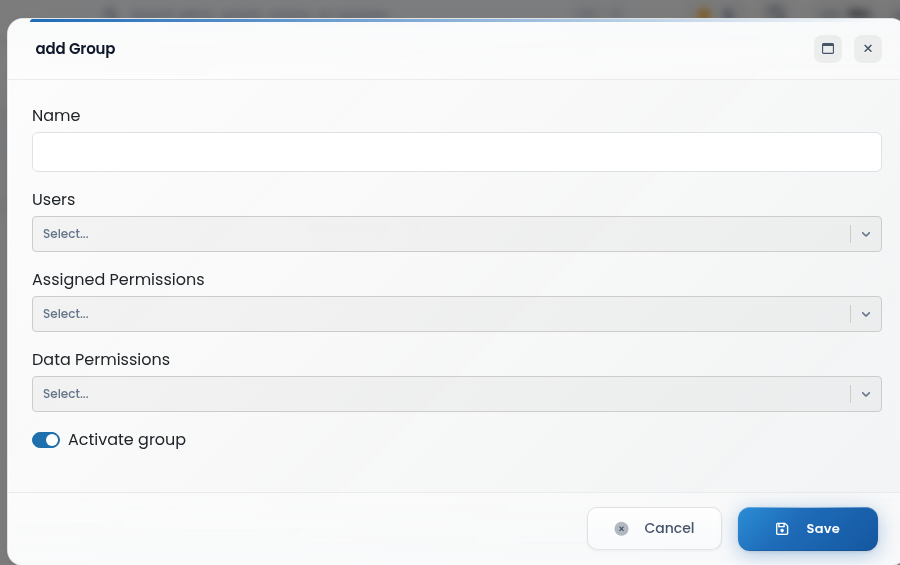
In the Name field, you have to provide a name, such as Users Restricted Permissions.
In the Users field, select the users that will be impacted by the predefined rules.
In the Assigned Permissions field, select the appropriate permissions for the selected users.
Decrypt permission - Users who are members of a group with the Decrypt permission can view the original values of anonymized fields. Users who do not belong to a group with the Decrypt permission will see the anonymized values when accessing event data in CYBERQUEST components such as Browser and Reports.
In the Data Permissions field, you have to select the appropiate data and the selected users can view.
e. By default the new group is enabled. Deactivate the group by selecting  option.
f. Press “Save” button to add new defined group and close the window or press “Cancel” button to close the window without saving changes. As an option, you can close the window without saving changes by clicking the  mark in top-right corner.
Delete User Groups
To delete a group, navigate to Settings menu by pressing
button, in the left side of the interface where are the quick access buttons, then click Users and groups > Groups . Press  icon and confirm deletion of desired group. The procedure is irreversible. Built-in groups cannot be deleted.

Edit User Groups
To edit a group, navigate to Settings menu by pressing
button, in the left side of the interface where are the quick access buttons, then click Users and groups > Groups. Press  icon and the edit group window is displayed where you can change group name, group members, assigned permissions and data permissions.
Changing group members, assigned permissions and data permissions is one by selecting or de-selecting objects in each drop-down list.
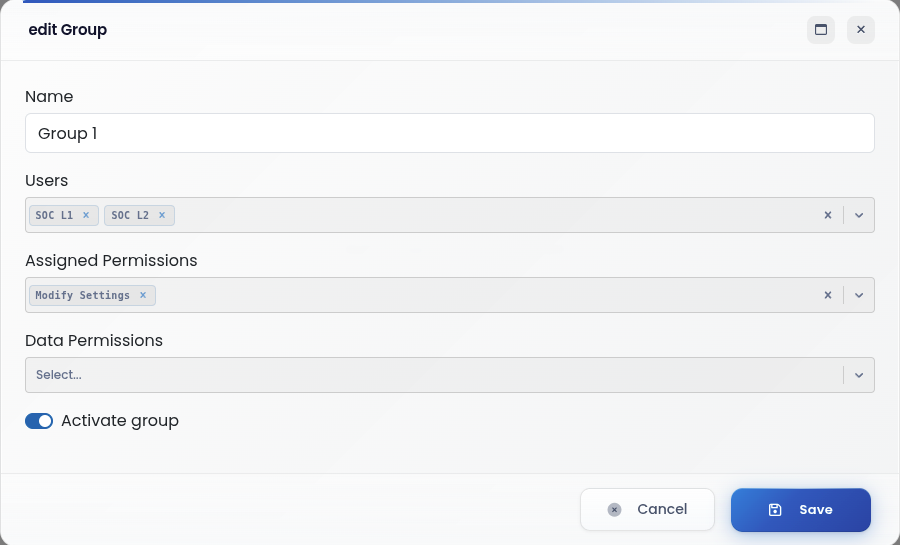
Press “Save” button to save changes and close the window or press “Cancel” button to close the window without saving changes. As an option, you can close the window without saving changes by clicking the
mark in top-right corner.
You can also change group status being Enabled or Disabled. Group status can be quickly changed from main Groups window by actioning on Active option button and selecting On or Off. In this case, changes are saved automatically.
For built-in groups you will only be allowed to add or remove members.
Dashboards migration
Each user can create his own dashgroups containing its own dashboards, but only an administrator can migrate a dashboard from a user to another. After creating a new user, an administrator can copy dashgroups from another user that already has dashgroups configured. To do this, follow the next steps:
a. Login to application with an administrative account.
b. Navigate to Settings menu by pressing
button, in the left side of the interface where are the quick access buttons, then click Users and groups > Users.
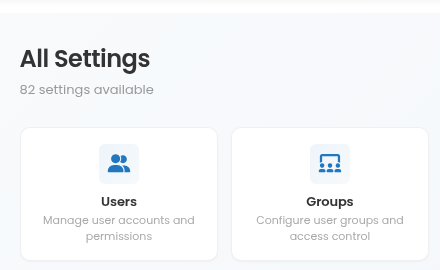
c. Users configuration page opens:
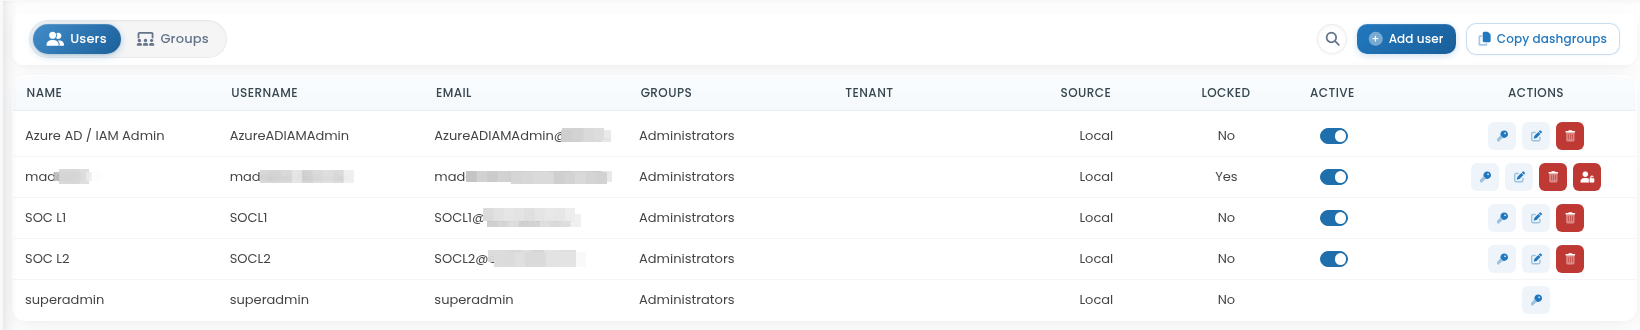
d. In Users page, click  button and window will open:
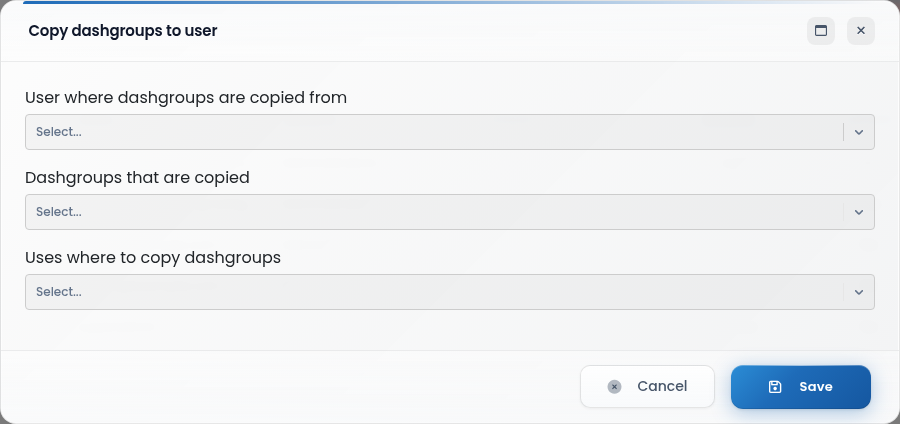
Check source and destination users from User where dashgroups are copied from and Users where to copy dashgroups drop-down lists. Select desired dashgroups from Dashgroups that are copied drop-down list and press “Save” button to save changes.
e. Logout from the administrative account and login with the new user account. After login is successful, the Dashboards module will show the new dashgroups selected during previous step.
Data permissions
CYBERQUEST provides data permissions options, which combined with the role-based access features offers a granulized control over the data made available for user members of a group. Data permissions are set at group level.
In order to change data permissions for an existing group, follow these steps:
a. Login to web interface with a user with administrative rights.
b. Navigate to Settings menu by pressing
button, in the left side of the interface where are the quick access buttons, then click Users and groups > Groups.
c. Groups configuration page opens:
d. In Groups page, you have to press
button, for the group containing the user for which you want to change data permissions. Edit group window opens.
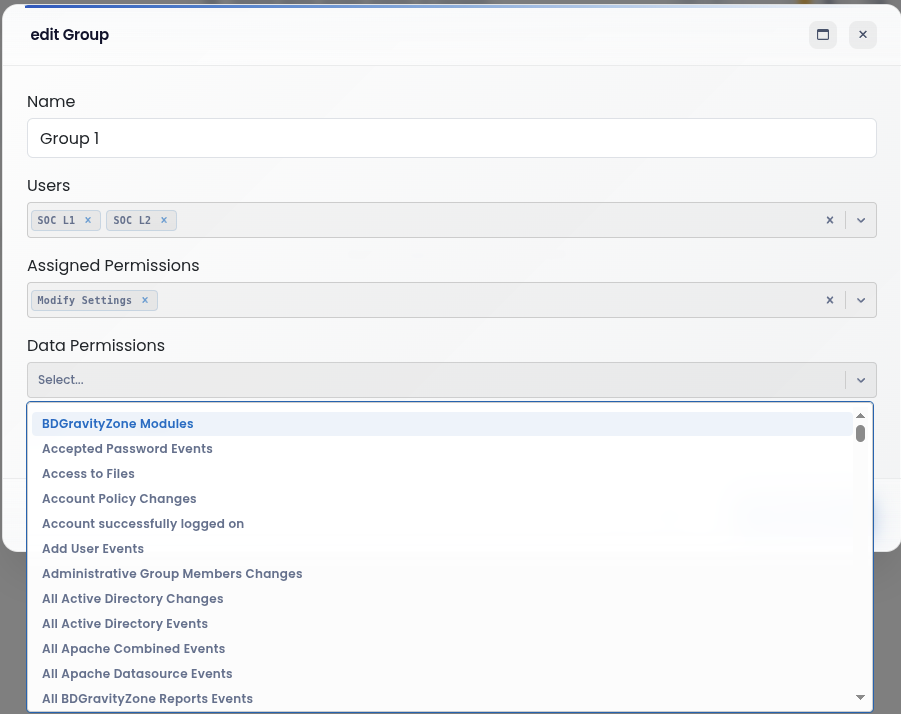
In Data Permissions field select or deselect on the appropriate data permissions. If no filter is selected, the user will have unrestricted access to all data available.
e. Press “Save” button to save changes and close the window or press “Cancel” button to close the window without saving changes. As an option, you can close the window without saving changes by clicking the
mark in top-right corner.
Configure LDAP authentication
CYBERQUEST can be integrated with Active Directory or LDAP systems, allowing users to directly authenticate to CYBERQUEST. To do this, please follow these steps:
a. Login to web interface with a user with administrative rights.
b. In web interface select Settings > Application Settings > Active Directory.

c. Active Directory configuration page opens.
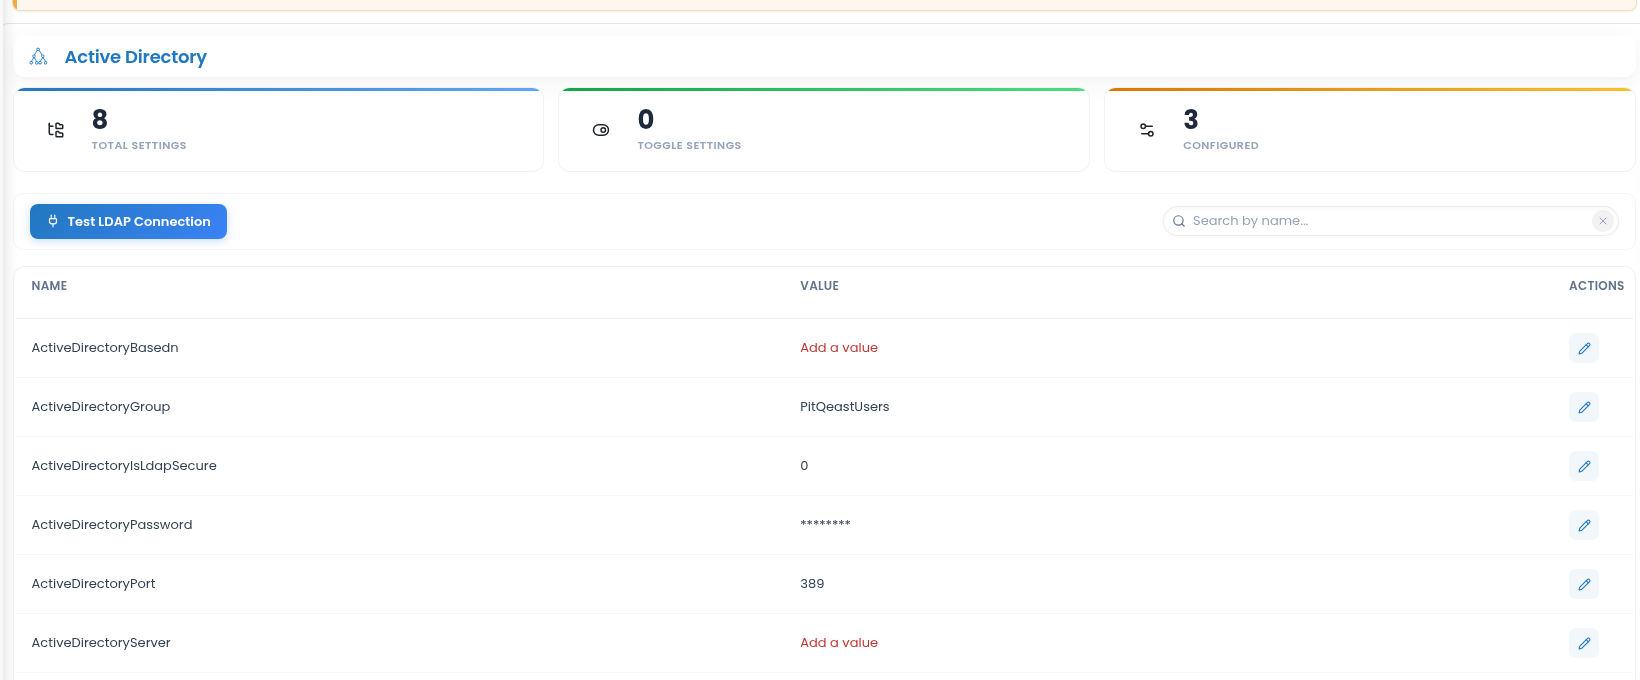
The following fields can be edited:
- Active Directory Basedn: Location of the user used to connect to Active Directory. Example: “CN=Users,DC=domain,DC=com”.
- Active Directory Group: The Active Directory group intended for synchronizing users with CYBERQUEST. Default group is PitQeastUsers.
- ActiveDirectoryIsLdapSecure - the active directory is secured (0 is LDAP)
- Active Directory Password: Account password for the mentioned username which is in ActiveDirectoryUser.
- Active Directory Port: The port for connecting with Active Directory LDAP service. Default port is 389
- Active Directory Server (address): The network IP address of Active Directory domain controller to query
- Active Directory Suffix: FQDN of the Active Directory domain
- Active Directory User: The administrative user used to connect to Active Directory. Example: “domain\Administrator”. It is also the default user under which CYBERQUEST will perform event collection from Active Directory infrastructure
To edit the setting of this fields you have to press
button, the window will open:
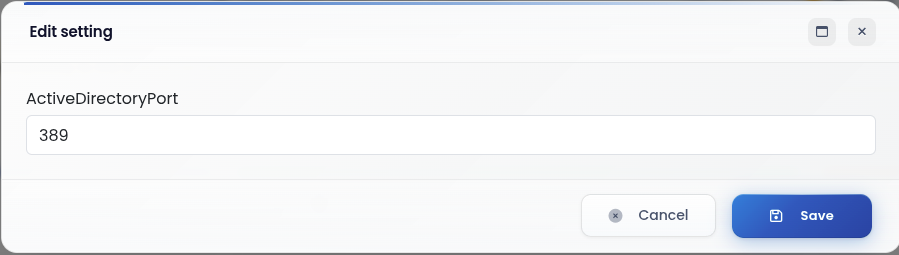
For each setting, press “Save” button to save changes and close the window or press “Cancel” button to close the window without saving changes. As an option, you can close the window without saving changes by clicking the
mark in top-right corner.
After authentification, every new user has to be added by a CYBERQUEST administrator to their first group. After being added to one or more groups, new users can also be promoted as administrators, if needed.
Configure LDAPS authentication
CYBERQUEST can be integrated with Active Directory or LDAPS systems, allowing users to directly authenticate to CYBERQUEST. To do this, please follow these steps:
a. Login to web interface with a user with administrative rights.
b. In web interface select Settings > Application Settings > Active Directory.
c. Active Directory configuration page opens.
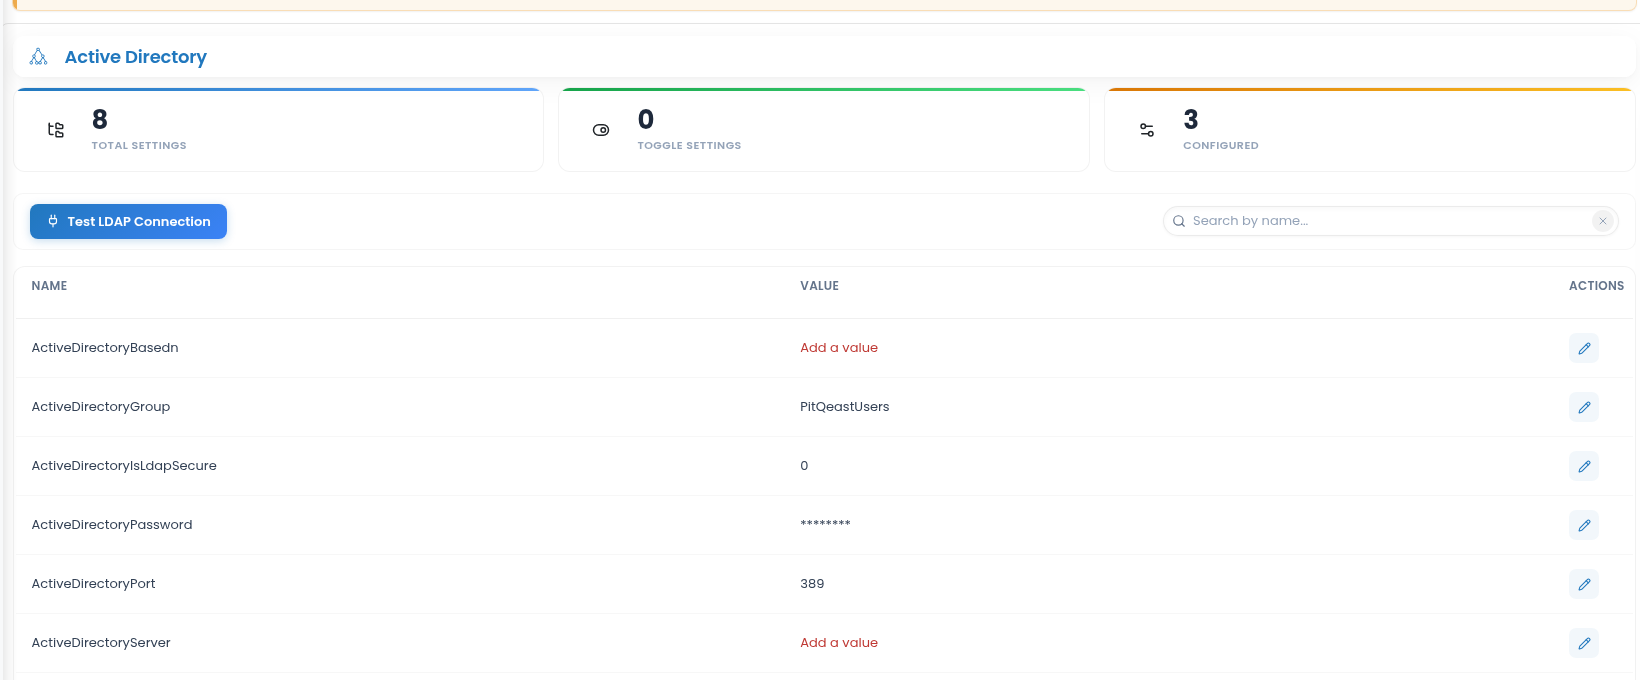
ActiveDirectoryIsLdapSecure - the active directory is secured (1 is for LDAPS)
The server certificate must be imported into the CQ server certificate store, and the certificate must be installed.
If it cannot be installed and has errors, the alternative is to put the certificate created in Windows (client.crt) in the path:
etc/ssl/certs/client.crt
After that, you have to restart
systemctl restart php7.4-fpm.service
systemctl restart nginx.service
The default port for LDAPS is 636.
Configure RADIUS authentication
CYBERQUEST supports external user authentication through integration with a RADIUS server. This integration allows user credentials to be validated through the organization’s centralized RADIUS authentication infrastructure.
To configure RADIUS authentication, follow these steps:
a. Log in to the CYBERQUEST Web Interface using an account with administrative privileges.
b. Open the RADIUS authentication configuration page from the application settings.
c. Configure the connection parameters of the external RADIUS server and enable RADIUS authentication.
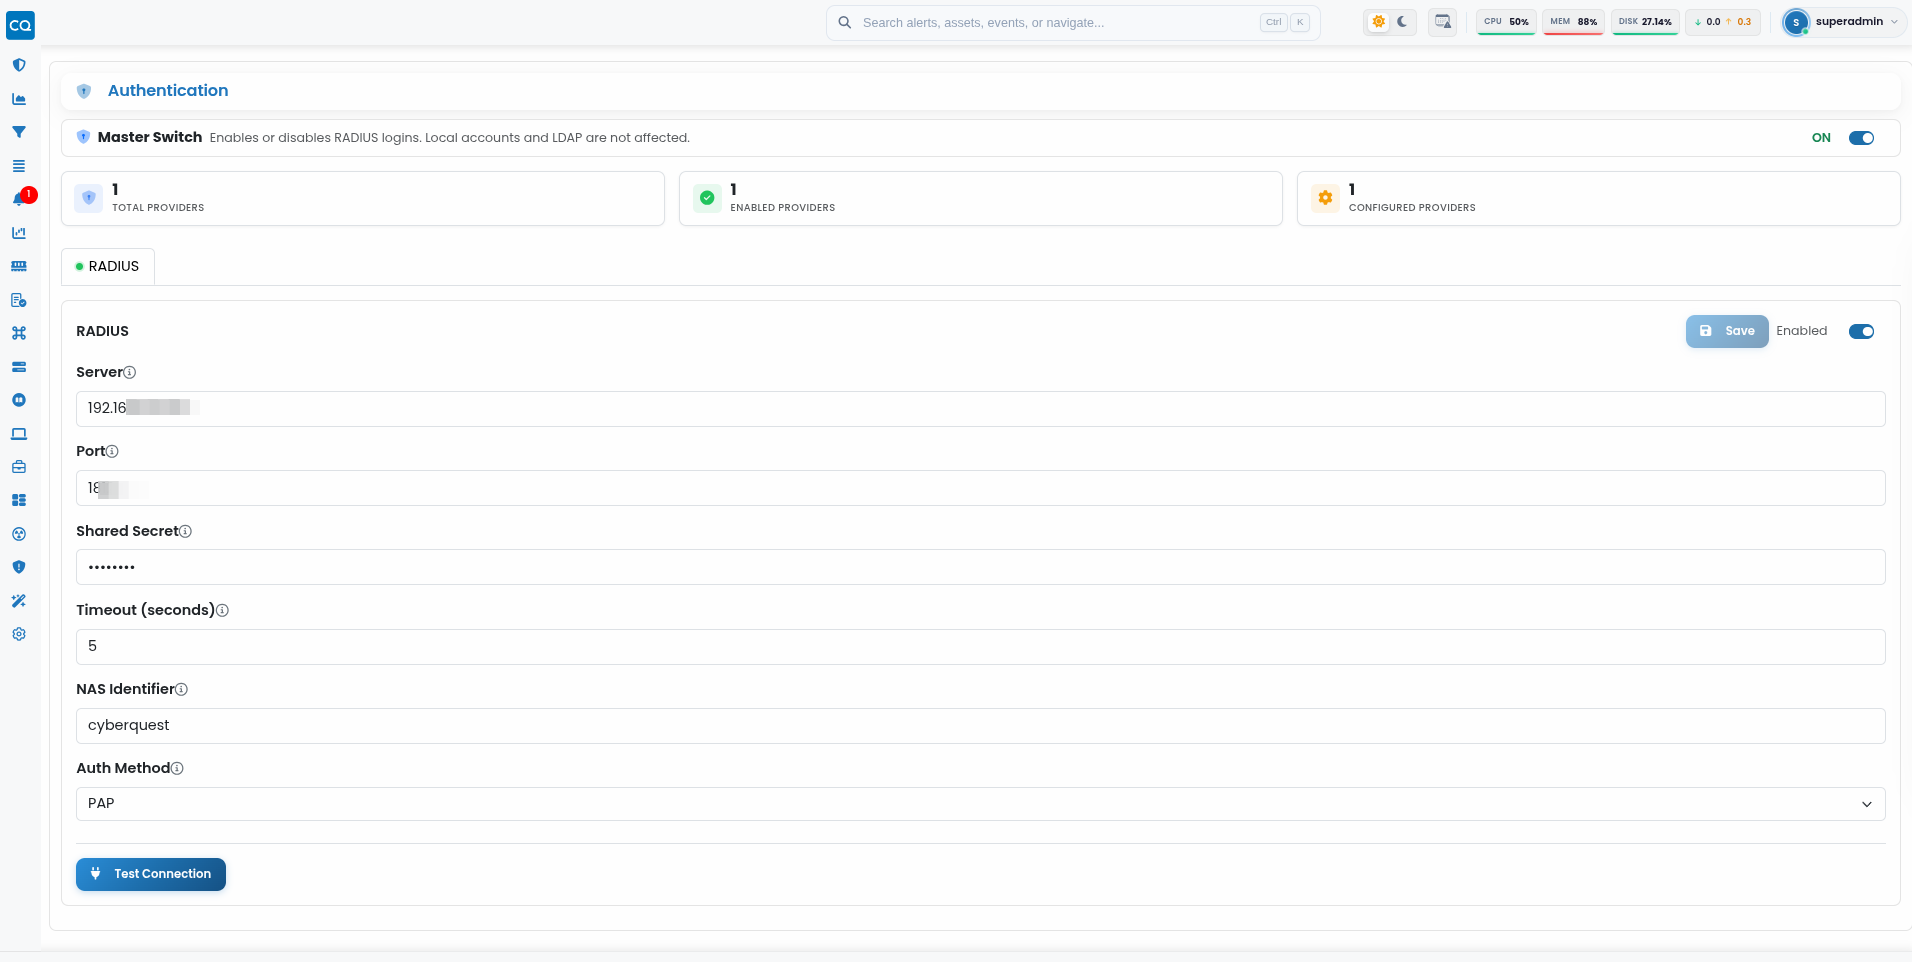
d. Save the configuration.
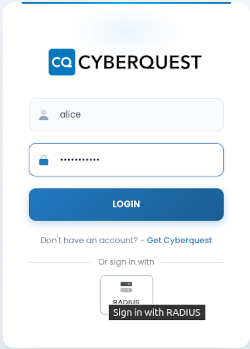
Once RADIUS authentication is enabled, the RADIUS option becomes available on the CYBERQUEST authentication page. Users enter their credentials and select RADIUS, after which the authentication request is validated by the configured external RADIUS server.
Add two factor authentication
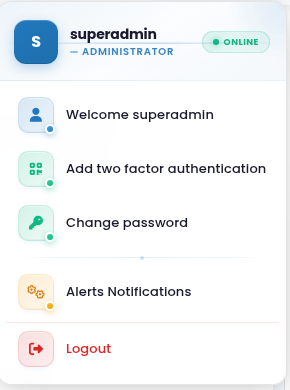
With two-factor authentication (2FA), you add an extra layer of security to your account. In addition to your password, you’ll also need a code generated by Google Authenticator on your phone.
From User actions menu, select Add two factor authentication:
To see how to activate 2FA, please follow the links below:
How to enable two-factor authentication (2FA) to an user account, please access the link: How to enable two-factor authentication (2FA) to an user account.
How to disable two-factor authentication (2FA) to an user account, please access the link: How to disable two-factor authentication (2FA) to an user account.